


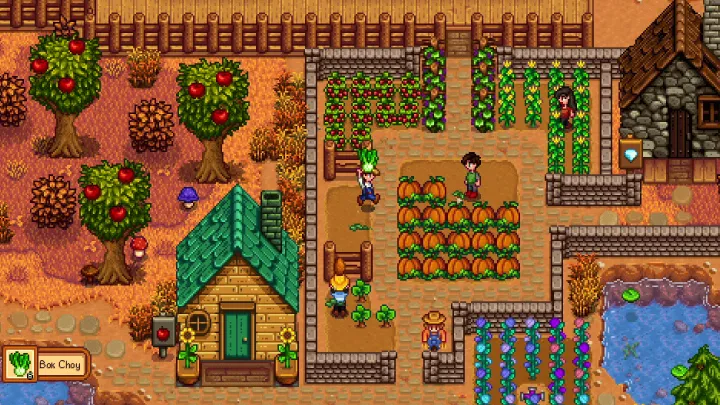
Stardew Valley isn't just a game about farming; it’s a digital escape into a world of community, discovery, and personal growth. When you first inherit your grandfather’s old, overgrown plot of land, the task ahead can feel overwhelming. With nothing but a few hand-me-down tools and a handful of parsnip seeds, you are tasked with breathing life back into a dilapidated farm and, by extension, the fading spirit of Pelican Town.
Mastering this cozy RPG requires a blend of strategic planning, time management, and an open heart toward the colorful cast of NPCs. Whether you want to become a billionaire artisan, a master angler, or a courageous dungeoneer, success in the valley is built on the choices you make in your first few seasons. This guide will walk you through the essential steps to conquering the valley, ensuring your farm thrives for generations to come.
1. Setting the Foundation: How to Choose Your Map and First Seeds
Your journey begins before you even step off the bus. Selecting the right Farm Layout is the most critical decision for your long-term playstyle. While the Standard Farm offers the most space for traditional crops, the Forest Farm provides easy access to forageables, and the Meadowlands Farm (perfect for animal lovers) starts you off with a coop and two chickens. Choose a map that aligns with your ultimate goals—space for automation or aesthetics for a cozy retreat.
Once you arrive, your immediate priority is the Spring Year 1 grind. You start with 15 Parsnip seeds, but you should quickly pivot to Kale or Potatoes for better early-game profit margins. However, keep a close eye on the calendar for the Egg Festival on Spring 13th. Saving every gold piece to buy Strawberry Seeds is the "pro-gamer" move, as they are the most profitable crop of the first season.
Essential First Steps:
- Clear a small path: Don't try to clear the whole farm at once; you'll run out of energy.
- Check the TV: Every morning, watch "The Queen of Sauce" for recipes and "Livin' off the Land" for tips.
- Craft a Chest: You need 50 wood. Do this on Day 1 to manage your limited inventory.
2. Master the Art of Energy Management and Tool Upgrades
In the early weeks, your greatest enemy isn't time—it's your Energy Bar. Chopping trees and watering crops consumes stamina quickly. To stay productive, you must learn to supplement your energy through foraging. Items like Field Snacks (crafted from tree seeds) and wild Spring Onions found south of Leah’s cottage are lifesavers.
As you accumulate wealth, your next logical step is visiting Clint the Blacksmith. Upgrading your tools from Copper to Iridium is a game-changer for efficiency. A Copper Watering Can allows you to water three tiles at once, drastically reducing the time spent on chores and freeing up your afternoons for social calls or mining.
Priorities for Tool Upgrades:
- The Pickaxe: Allows you to break larger rocks in the mines faster.
- The Axe: Essential for clearing stumps and logs to gain Hardwood.
- The Watering Can: Vital only until you build your first Sprinklers.
3. How to Restore the Community Center: A Strategic Approach
The heart of Stardew Valley’s progression lies in the Community Center. Restoring it is a long-term project that unlocks massive game features, such as the Greenhouse and the Bus to the Desert. To do this efficiently, you must track "Bundles"—collections of specific items from different seasons. Missing a single seasonal fish or crop can delay your progress by an entire in-game year.
Focus on the Pantry Bundle first. Completing this unlocks the Greenhouse, which allows you to grow any crop regardless of the season. This is where you will eventually plant your Ancient Fruit or Starfruit for infinite wealth. Always check the Traveling Cart near the Wizard’s Tower on Fridays and Sundays; she often sells rare items needed for bundles, like the Red Cabbage or Truffle Oil.
The Key Bundles to Watch:
- Boiler Room: Easy to finish; unlocks Minecarts for fast travel.
- Crafts Room: Requires foraging; unlocks the Bridge to the Quarry.
- Vault: Requires raw gold; unlocks the Calico Desert.
4. Developing a Profitable Crop Rotation for Every Season
To maximize your gold per day ($G/d$), you need to understand the hierarchy of seeds. In Summer, the undisputed king is Blueberries. They produce multiple crops per harvest and continue to regrow. In Fall, focus on Cranberries or Pumpkins. If you have enough saved, investing in Rare Seeds (purchased from the Traveling Cart) will yield Sweet Gem Berries, the highest-selling single item in the game.
Beyond just planting, you must think about Artisan Goods. Selling raw crops is a rookie mistake. By building Kegs and Preserves Jars, you can turn a 100g melon into a 750g wine. This transformation is the secret to moving from "struggling farmer" to "valley tycoon."
Best Crops for Processing:
- Hops: Turn them into Pale Ale in Kegs for a massive 12x return on investment.
- Melons: Best used in Preserves Jars.
- Ancient Fruit: Once you find the Ancient Seed artifact, fill your Greenhouse with these to produce high-value wine year-round.
5. Navigating the Mines: Combat and Resource Gathering
Mining is your primary source of ores (Copper, Iron, Gold, and Iridium) and Gems. As you descend the 120 floors of the local mines, you’ll face increasingly difficult monsters. To survive, you must master the "hit-and-knockback" rhythm of combat. Always bring food with Buffs, such as Spicy Eel for speed and luck, or Miners Treat for better mining efficiency.
Once you reach the bottom of the mines and repair the bus, you gain access to the Skull Cavern. This is the "end-game" dungeon where the real riches lie. Unlike the regular mines, there is no elevator here. You must use Staircases and Mega Bombs to descend as quickly as possible to floors 50+, where Iridium Ore becomes common.
Tips for Deep Diving:
- Check Luck: Only go on "Greatest Luck" days (check the TV).
- The Slime Charmer Ring: Earn this by killing 1,000 slimes; it makes you immune to slime damage.
- Galaxy Sword: Bring a Prismatic Shard to the three pillars in the desert to claim the best weapon in the game.
6. How to Build Relationships and Win Hearts in Pelican Town
Pelican Town is home to over 30 unique residents, each with their own schedules, likes, and dislikes. Building friendships isn't just for flavor; high friendship levels unlock unique recipes, gifts in the mail, and essential "Heart Events" that flesh out the story. To win hearts quickly, give two gifts per week plus a gift on their birthday (which provides an 8x multiplier to friendship points).
The most universal "Loved" gifts include Prismatic Shards (except for Haley) and Rabbit's Feet. However, early on, easy-to-get items like Mayonnaise, Coffee, and Sashimi are favorites for a large portion of the town. Once you reach 8 or 10 hearts with a bachelor or bachelorette, you can consider marriage by purchasing a Mermaid's Pendant on a rainy day.
Top Tier Gift-Giving:
- Linus: Give him Cactus Fruit or Yams; he's the easiest to befriend and gives you the "Sashimi" recipe.
- Caroline: Reach 2 hearts to unlock her sunroom and get the "Tea Sapling" recipe—a massive early-game money maker.
- Shane: Reach 8 hearts to unlock Blue Chickens.
7. Livestock and Ranching: Managing Your Animals
While crops provide seasonal bursts of income, Animals provide a steady, daily cash flow. Starting with a Coop for Chickens and a Barn for Cows is the standard path. To make ranching profitable, you must process everything. Turn milk into Cheese and eggs into Mayonnaise.
As you upgrade your buildings, you'll unlock Pigs, which are arguably the most profitable animals in the game. Pigs find Truffles, which can be turned into Truffle Oil. On a high-luck day with a max-level Foraging skill (Botanist profession), a single pig can earn you thousands of gold daily. Just remember: animals need hay in the winter, so build a Silo before you clear the grass on your farm!
8. Leveling Skills and Choosing the Best Professions
Every action in the game contributes to one of five skills: Farming, Mining, Foraging, Fishing, and Combat. At levels 5 and 10, you must choose a Profession. These choices can drastically alter your income. For example, in the Farming skill, the Artisan profession (Level 10) increases the value of wine and cheese by 40%.
If you find you’ve made a mistake, don't panic. You can change your professions later by visiting the Statue of Uncertainty in the Sewers for 10,000g.
Recommended Professions:
- Farming: Tiller → Artisan (The gold standard).
- Foraging: Gatherer → Botanist (Makes all forage items Iridium quality).
- Mining: Miner → Prospector (Helps find more coal, which is always in short supply).
- Fishing: Fisher → Angler (Essential for early-game gold).
9. Expanding Your Horizon: Ginger Island and the Late Game
After finishing the Community Center, the game doesn't end—it expands. You will help Willy repair his boat to reach Ginger Island. This tropical paradise functions like a second, permanent-summer farm. Here, you collect Golden Walnuts to unlock new areas, including the Volcano Dungeon and the Island Farmhouse.
Ginger Island is home to Mr. Qi and his "Qi Challenges." These are high-difficulty tasks that reward you with Qi Gems, used to buy the most powerful items in the game, like the Hopper (for automation) or Pressure Nozzles (to increase sprinkler range). This is also where you will work toward "True Perfection," the ultimate 100% completion goal.
10. Efficiency Through Automation and Layout Design
As you enter Year 3 and beyond, your focus should shift from manual labor to Automation. Using Iridium Sprinklers means you never have to water crops again. Using Auto-Grabbers and Auto-Petters in your barns and coops saves hours of chores every morning.
A well-organized farm isn't just beautiful; it's functional. Use Pathing to prevent weeds from spreading and speed up your movement. Place your most-used machines (like Kegs or Crystalariums) in Sheds to maximize space. By the time you reach the end-game, your farm should run like a well-oiled machine, allowing you the freedom to decorate, fish, or explore at your leisure.
Advanced Layout Tips:
- Junimo Huts: Place these in the center of your fields; Junimos will harvest your crops for you.
- Obelisks: Build these to teleport instantly to the Beach, Desert, or Island.
- The Golden Clock: The ultimate late-game building that prevents debris from appearing on your farm.
Conclusion
Stardew Valley is a masterpiece of game design that rewards patience, planning, and curiosity. From the humble beginnings of clearing weeds to the complex logistics of a Ginger Island empire, every step of the journey is uniquely yours. By focusing on the Community Center, mastering the mines, and building lasting relationships, you transform a neglected plot of land into a thriving sanctuary. Remember, there is no "wrong" way to play—the valley moves at your pace. Whether you are a speed-runner or a casual decorator, the real magic of the game lies in the stories you create along the way.
Summary: Master Stardew Valley by choosing the right farm, prioritizing the Community Center, automating with sprinklers, and building relationships for a 100% completion.